When it is cold one should turn on the oven

•10/17/2010 • 4 Comments

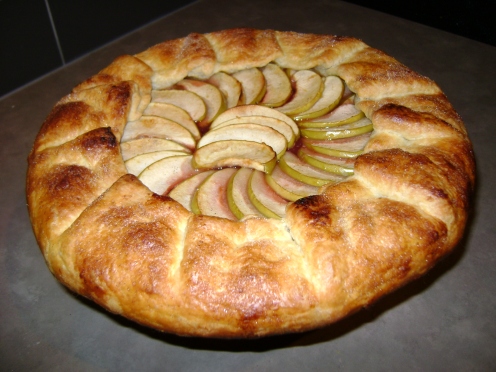
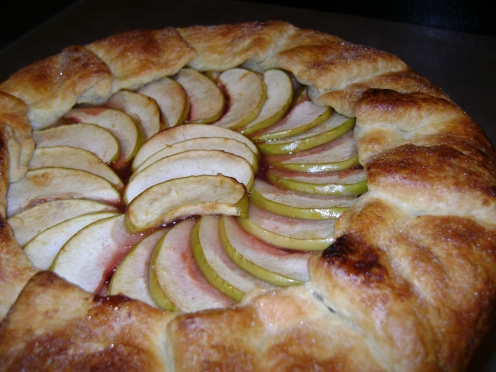
It has most certainly been cooler around here. Not feeling like I’m ready to turn on any sort of heat in our home I have resorted to baking more things. Some of the wasted oven heat has made it nice a toasty in here, not to mention it smells delicious. I’m on a bit of a pastry making addiction again, starting with ever so simple and delicious quiche. Then I moved onto sweeter treats, making an apple galette with crisp tart granny smith apples. I’m sure many types of apple would do, but I really enjoy the taste and texture of a baked granny smith. If you aren’t the sort of person to arrange the apples evenly in a circle you could just toss them all in there and make an equally delicious galette. Aside from the pastry I didn’t follow a recipe so I will do my best to recreate one for you all.

Apple Galette with plum sauce

Chilled pastry (I make all butter pastry, but any kind you like will do)

4-5 plums
1/4 cup white sugar
1 stick cinnamon
1 nut of nutmeg
8 cloves
1 cup water
4-5 medium granny smith apples
1 tablespoon fresh lemon juice
1/2 tablespoon of lemon rind
1/4 cup milk
1 small vanilla pod (I used about 2 inches off a large pod)

Pit and chop the plums. Stir plums, sugar, water, cinnamon, nutmeg and cloves in a medium saucepan. Slowly simmer until it turns to a thick jam consistency. The more difficult part is fishing out the cloves at the end. You could also used ground spices to eliminate that problem, or tie them in a small parcel of cheese cloth to remove at the end. Set aside.

While that is simmering away you can core and slice the apples. I like the skin on mine but if you don’t peel the apples as well. In a bowl toss the apples with the lemon juice and rind.

Preheat the oven to 450 at this point.

Roll out the pastry into a large fairly thin circle. I usually get mine between 1/4 inch and 1/8 inch. It will more likely turn out soggy if you have it too thick. Place the pastry onto a round flat pan, I use the bottom from a spring form pan. Spread a few large spoonfuls of the plum sauce over the pastry, leaving 2 inches around the perimeter. Arrange the apples however you like but make sure they are fairly evenly spread out. Fold the edges over onto the apples. Again this can be as neat or as messy as you like it.

Make a wash with the milk and vanilla bean but scraping the pod into the milk and giving in a good wisk. Brush all over the pastry.

Bake at 450 for 20mins, then reduce heat to 375 and finish baking for 30 more minutes. The crust should be a nice golden brown colour. If your pastry doesn’t have sugar in it then you won’t get it as golden.

Another Chocolate Cake

•09/26/2010 • 4 Comments


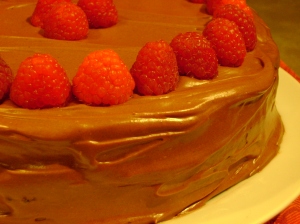
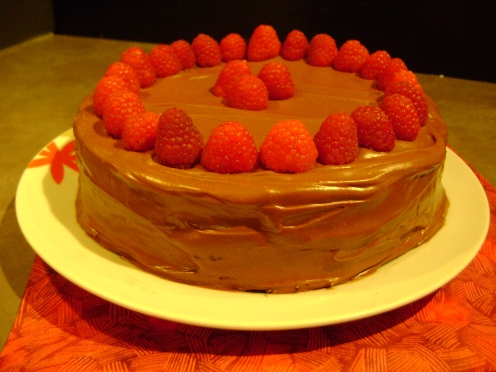
The best chocolate cake recipe I have ever had or made has to be Nigella’s Old Fashion Chocolate Cake. In fact I don’t think there are many chocolate things Nigella has recipe’s far that aren’t worth the time. The best part of this one is that it doesn’t take any time. I still prefer to mix it by hand rather than in a food processor, mainly because cleaning up a food processor to me is more of a pain than cutting out a bit of time in the kitchen. That may also be because I leave the dishes for Matt a lot of the time.

I’ve been experimenting with the cake recipe and different flours and sugars. Not that I am really trying to make a health chocolate cake, but maybe one a wee bit more healthy. Today’s cake was a mix of all-purpose flour and almond flour. Almond flour is just fine ground blanched almonds so as one can expect it doesn’t bake like regular wheat flour. I also used only half of the white sugar called for, making up the rest with raw cane sugar. The extra flavors in the cane sugar really add to the chocolate. Speaking of chocolate I doubled the cocoa from the original amount. Why? Because it is chocolate people! So until I get to purchasing some more flours here is a cake to feast your eyes upon.

Cheddar Muffins

•09/22/2010 • 5 Comments

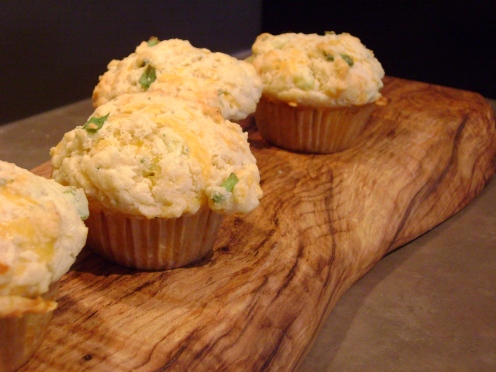
Mmm cheese. Where can one go wrong with cheese? A local coffee shop has one of my favorite muffins with cheddar and feta. I could eat them by the dozen so I am always on the hunt for savory cheese muffins. This morning I woke up, looked in the fridge and had some cheddar and green onions to use up. This recipe is kind of a mash-up but I think the end result is quite satisfying. I’m eating one warm out of the oven smothered in butter as I write this post. I also tossed in a tablespoon of ‘3 Onion’ dip mix, which is just dried onion, chive, scallion for some extra oniony taste.

Giant Cheddar Muffins

2 cups all-purpose flour
1 tablespoon baking powder
1 teaspoon salt
1 large egg
1 cup milk
1/2 cup vegetable oil
3/4 cup grated cheddar cheese
1/4 cup chopped green onions or chives

Preheat oven to 375 degrees F.

Combine dry ingredients in a large bowl. Toss in cheddar and green onions/chives, lightly coating with the flour to prevent them from all sticking in one place in the batter.

Beat together egg, milk and oil. Making a well in the dry ingredients at the wet and gently stir until its all just moistened.

Fill large muffin tins with batter, I make 6 big ones with hardly any batter left over. They are overfilled but since the batter is quite thick it stays in place. Bake for 20-25 minutes. Remove, cool and serve.

Tasty tasty fava beans

•05/31/2010 • 1 Comment

I’ve joined the endless number of blogger and twitter people in deciding to participate in meatless monday. For those who haven’t heard about it before you can check out the official Meatless Monday site. In reality I have about half of my days as meatless days so I can’t promise to make every monday a meatless one. It’s easy on the bank account and a great way for carnivores to get creative.

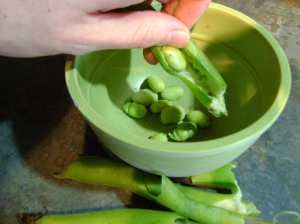
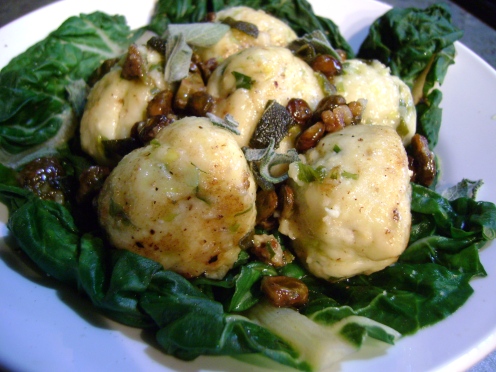
In my produce box this week I received a bag of fava beans. I don’t think I have ever had a fava bean, at least not that I am aware of. I had no idea at all how to cook them or what to put them in. Thank goodness for the internet and its endless ability to be a resource for great recipes. I was at work on my break playing around with my phone recipe apps when I came across Ricotta Gnocchi with Leeks and Fava Beans. Awesome because I had everything except for the ricotta.

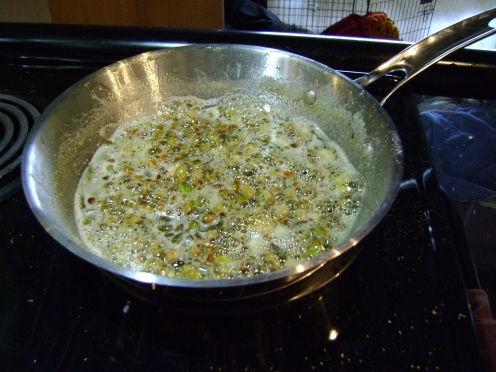
I often don’t try recipes with such a low rating on epicurious but I decided that all those people must have faulty taste buds, I think I was right. I have a love for steamed dark leafy greens so I served this dish on a bed of green chard. I imagine it could go on a bed of pasta as well but that may get a little heavy in the stomach. I followed the recipe as is, next time I would start browning the butter before adding the sage and beans as my beans and sage got over cooked. At least they didn’t burn to the point of inedibility (is that a word? I don’t know). In the end I kind of liked the slight crunch they gave when eating them though. The texture reminded me a bit of toasted soya or garbanzo beans.


My favorite part of making this dish was all the steps that went into it. Shelling beans reminded me of shelling endless buckets of peas from the garden with my family. The inside of the shells were so soft and fuzzy. I’d now rather be two fava beans in a pod than two peas in a pod, they have way better pod interiors. And honestly who doesn’t like getting their hands all sticky and doughy when cooking, which is how my hands ended up after rolling all the gnocchi balls. Fun I say!

Saturday Blog Showcase #21 (it think!?)

•05/29/2010 • 3 Comments


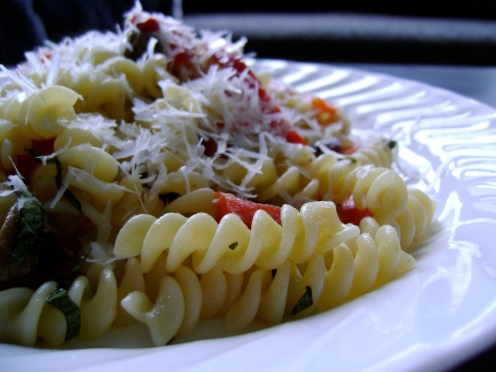
I missed out on many weeks of the blog showcase. But I have one to share. This one again came from Ann’s blog some time ago. It was the perfect dinner to make for my Dad and brother when they came for a quick visit. My family is all very active so we often filled our bellies full of pasta as fuel for all of our various activities. They both enjoyed this one.

Pasta can’t really get much easier but this one was super easy. I’d say even if you can’t cook you could make this in about 20 minutes from start to finish. I used cut olives because the full ones at the store didn’t look very good that day. I added extra garlic because one can never have too much right? If I were to make this one again I would probably not even bother having pitted olives, as I like the juicy taste whole ones have but its not as pretty to spit out pits on the side of ones plate.

Peperoni Sauce (adapted from Thibeault’s Table)

2 medium Red Peppers
2 minced garlic clove
10 Kalamata olives (I bought them pitted and chopped)
1 tablespoons capers
olive oil
salt
2 oz. butter Softened
4 oz parmesan cheese, Grated
a little cream
fresh basil

Start the sauce when you put the water on to boil for the pasta.

Wash, dry and deseed and cut the peppers into thin strips lengthways. Stone and cut each olive into three or four pieces. (I didn’t do that because the grocery store did it for me!) Wash and dry the capers if they have been salted.

Coat the bottom of a large frying pan with olive oil and gently fry the peppers until tender, adding the olives, capers and garlic halfway through the cooking time. Salt to taste. Strain off the excess olive oil.

When the pasta is cooked, transfer it to a serving dish and pour the sauce over the top. Heat the butter and cream and toss with pasta. Add basil if using. Add the Parmesan cheese and mix thoroughly.

Serve individual portions with extra Parmesan if liked.

I’m Back!!

•05/28/2010 • 4 Comments

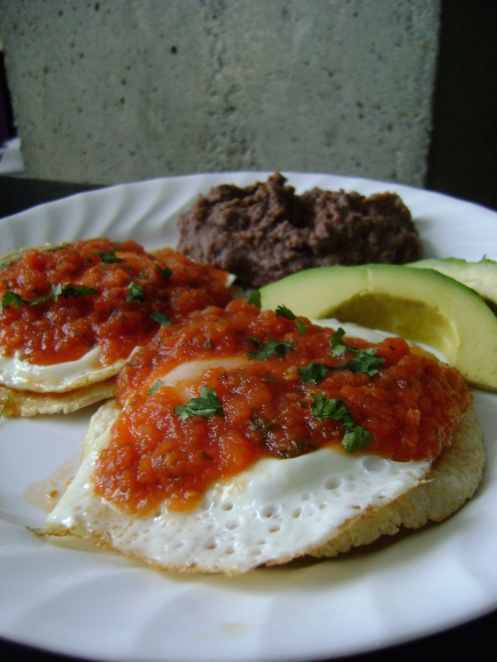
I’ve been cooking, and I had been taking pictures. Then the camera was at a friends house. Then I lost my cable to connect it to the computer. To sum it all up I found all the parts during a giant spring clean. Reorganized the kitchen and am ready to get back to the blog. Without wasting more space not talking about food I bring you a delicious brunch Matt and I had at some point over the past couple months.

I made huevos rancheros mainly because I wanted to use my new tortilla press I picked up at the market in Zihuatanejo. Honestly why do people buy tortillas? Well I used to before I learned how incredibly easy they are to make. Corn tortillas at least. This was a super simple brunch. Fry eggs, place on warm tortillas and cover with some fresh adobo salsa. We had sliced avocado and refried beans on the side.

Adobo Salsa
1 large can whole tomatoes in juice
1/2 cup chopped white onion
1/4 cup chopped fresh cilantro plus additional for sprinkling
2 tablespoon chopped canned chipotle chiles in adobo
3 garlic cloves, coarsely chopped
1 teaspoon salt

Add all ingredients into a blender or food processor. Blend it until its fairly smooth. Pour the puree into a saucepan and simmer slowly for at least 10 minutes. It will thicken slightly and get nice and warm.

No showcase, but a post

•03/06/2010 • 1 Comment

Hello from Mexico my foodie friends! Since my friend and I just arrived last night we haven’t had a chance to check out the market. It is certainly on the agenda for the day. To all of you well travelled foodies, what are some good items to bring back from Mexico? Obviously nothing fresh, all that fruit will have to be consumed here. I have heard the quality of vanilla beans is hit or miss, but isn’t a bean better than extract? At $4 a bean at home I may take a chance.

Just to give you a peek at the market I found a fellow food blogger with fanastic photos. Zihuatanejo Market tour by Vanilla and Garlic.

Saturday Blog Showcase #8

•02/27/2010 • 4 Comments

This week Lori at All That Splatters is the host of the weekly saturday blog showcase.

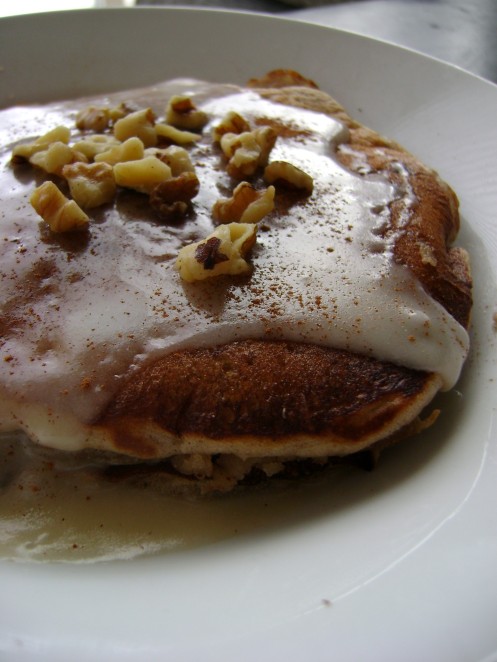
This week I made Cinnamon Bun Pancakes with Maple-Butter Icing from Real Mom Kitchen. I was a wee bit late to make them for National Pancake Day, although I also didn’t know such a day existed. These are more of a sweet treat than a breakfast food in my opinion. In fact I made them after a nice breakfast out one morning. I added berries to them to add a wee bit of something healthy to these, and who doesn’t love a blueberry pancake?

Cinnamon Bun Pancakes
(Adapted from Real Mom Kitchen)

1 1/2 cups All-purpose Flour
3 Tbsp White Sugar
1/2 tsp Salt
4 tsp Baking Powder
1 Tbsp Cinnamon
2 whole Eggs Beaten
1 cup Milk
2 Tablespoons Corn Syrup
¼ cups Butter, Melted
2 tsp Vanilla
1 tsp Maple extract
1 cup Blueberries

Combine first five ingredients in a medium bowl, stir well and set aside.

In a large bowl, beat together eggs, milk, corn syurp, butter and vanilla. Gently combine flour mixture, stir until the mixture is fully moistened. Add blueberries, stirring until incorporated evening in the batter.

Cook 1/2 cup of batter per pancake on a lightly oiled frying pan set at medium heat. I prefer cast iron for pancakes.

Serve with walnuts maple-butter icing drizzled over the top. Makes 12 pancakes.

Maple-Butter Icing (I recommend doubling the recipe)

1/4 Icing Sugar
1/4 cup Butter, Melted
Dash of salt
2 Tbsp Maple Syrup
1/4 cups cream (I used cereal cream)
1/4 cup Toasted Walnuts/pecans, Chopped

Whisk all ingredients together until smooth, adding the cream slowly until desired consistency is reached

Moleskine, my other love

•02/25/2010 • Leave a Comment


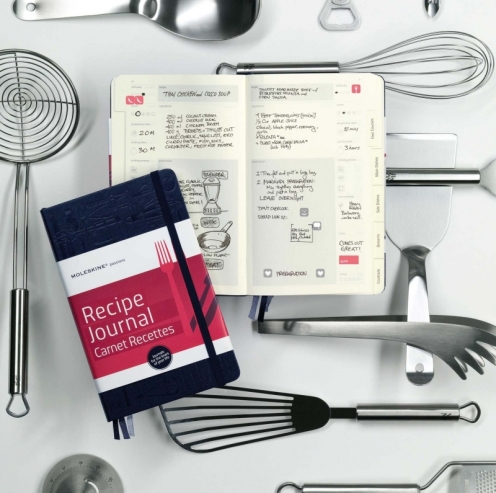
*image from MojoLondon.co.uk*

I am one of those people who thinks Moleskine journals are the greatest journals ever. The paper has the most perfect texture, they are a nice portable size and have durable covers. I recently discovered that Moleskine has a new journal line out, one of which is a recipe journal. I think I was as excited as anyone can be over a journal when I heard of them. I set out on a mission around town checking out all the retailers I knew that may have the new journals. One said they had just recieved a shipment but upon checking the stock room found they had already sold out earlier that day. With a wee bit of hesitation I ended up ordering a couple online.

My journals came today, well yesterday now given the time I am posting this. I am in love. I can wait to put together my scrapbook-esque collection of recipes. I’ll be sure to email my mom for some more of the family favorites. I am excited to use it as it will play more to my artistic side which has been rather neglected over the past while.

My only complaint so far is there is no tab labeled for baking or bread, nor is it included in any of the pre-printed stickers to relabel the tabs. It does come with a nice couple pages of conversions that I find I often need, especially when getting recipes from a variety of sources online. Switching between metric and imperial is hard for my brain that only know metric, except for cups, tablespoons, teaspoons.

Saturday Blog Showcase #7

•02/20/2010 • 3 Comments

Yes yes, week 6 is absent as it fell directly in the middle of my work week and I lacked any pre-planning last week to photograph something I made earlier in the week. And today’s is a wee bit late in the day, but I have good reason. I was out enjoying sunshine and purchasing some seeds from Seedy Saturday.

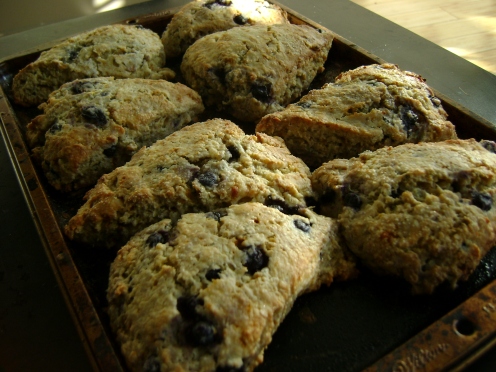
This week Ann at Thibeault’s Table is the host. Each week fellow food bloggers join her and Lori from All That Splatters to showcase recipes found on other food blogs. This week I made one of Ann’s recipes for scones. I used frozen blueberries for mine because that is what was in the freezer that morning. Really the only thing I changed was the sugars and amount of berries. I tend to substitute raw cane sugar in a lot of my baking but it doesn’t have as much sweetness as using white sugar. I made 8 of them and I think we ate 4 for breakfast when they were hot out of the oven.

Scones (Raspberry, Blueberry, Fresh Currants,etc..)
(adapted from Ann at Thibeault’s Table)

2 1/4 cups flour
1/4 cup white sugar
1/4 cup raw cane sugar
2 1/2 teaspoons baking powder
1/2 teaspoon salt
6 Tbsp. cold butter
1 cup heavy cream
1 cup frozen blueberries
extra cream and sugar

Preheat oven to 425 degrees F. Combine flour, sugar, baking powder, and salt. Cut butter into mixture with pastry blender until it resembles a course meal. Add cream and raspberries to dry ingredients. Mix lightly with fork until mixture forms a stiff dough. Knead on floured board just to incorporate all flour; try not to damage berries.

Roll into 7-inch round and cut into 6 or 8 wedges. Place 1 inch apart on greased baking sheet; brush tops with cream and sprinkle with sugar. Bake for 15 to 18 minutes.